

GeoSet by Trusted Proxies is our browser extension for Google Chrome and Mozilla Firefox. It lets you browse through your Trusted Proxies proxy servers with one click. This guide covers version 2.3.6 on both browsers. You can check your version in the extension's Settings, under System Status.
Table of Contents:
1. Installing the extension
2. Logging in
3. Connecting and switching between proxies
4. Disconnecting and logging out
5. Settings
6. Why the proxy disconnects
7. Reporting a problem
8. Adding more proxies
9. Uninstalling the extension
1. Installing the extension
Google Chrome
1. Open the extension in the Chrome Web Store.
2. Click Add to Chrome, then click Add extension.
3. To keep the extension visible, click the puzzle piece icon in the Chrome toolbar, then click the pin next to GeoSet by Trusted Proxies.
Mozilla Firefox
1. Open the extension on Firefox Add-ons.
2. Click Add to Firefox, then click Add to confirm.
3. To keep the extension visible, click the puzzle piece icon in the Firefox toolbar, click the gear next to GeoSet by Trusted Proxies, then choose Pin to Toolbar.
2. Logging in
You can log in with a link we email you, or with your API key. You don't need a proxy username or password. When you log in, the extension authorises the IP address you are browsing from on your account.
Log in with an email link
1. Click the extension icon.
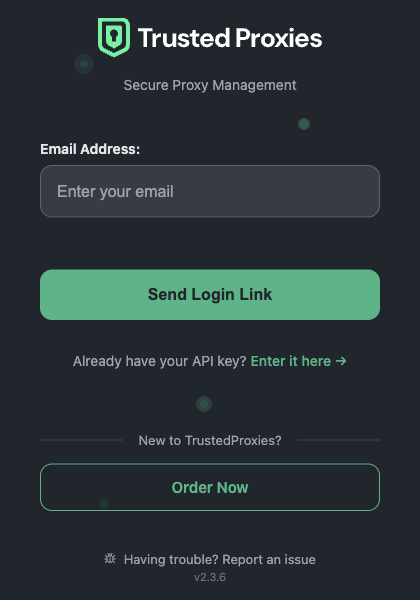
2. Enter the email address on your Trusted Proxies account and click Send Login Link.
3. Open the email from us and click the link. Open it in the same browser where the extension is installed. The link works once and expires after 60 minutes.
4. A page opens that says Authentication Successful! The extension picks up your login from this page. If the extension window doesn't open by itself, click the extension icon.
Log in with your API key
1. Click the extension icon.
2. Click Already have your API key? Enter it here.
3. Paste your API key and click Connect.
The Authentication Successful page from the email link also shows your API key, with a Copy API Key button. This is useful if the link opened in a different browser.
If the login doesn't complete and you see a message that your account may not have any proxies assigned, please contact us. The extension needs at least one active proxy on your account.
3. Connecting and switching between proxies
To connect
1. Click the extension icon.
2. Under Available proxies, click the list and choose a proxy. Proxies are named by country and type, for example US-Shared-00001.
3. Click Connect.
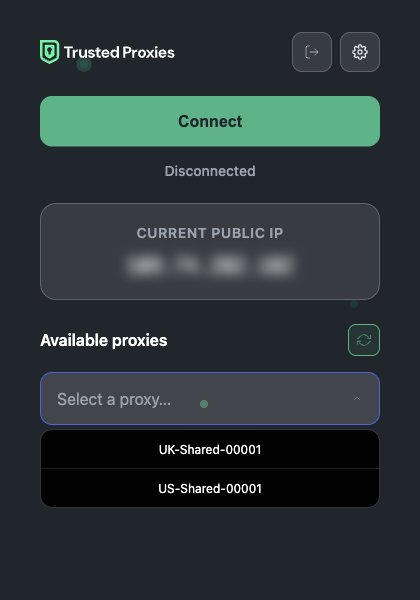
When you are connected, the window shows Connected to and the proxy name, and the box above the list shows the Proxy server IP. The extension icon turns green. When you are not connected, the icon is red and the box shows your own Current public IP.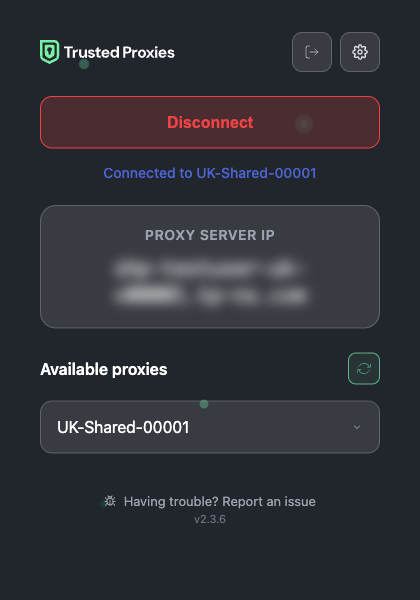
To switch to another proxy
While you are connected, choose a different proxy from the list. The extension switches straight away. You don't need to disconnect first.
To reload your list of proxies
Click the round arrows button next to Available proxies.
4. Disconnecting and logging out
Disconnect
Click Disconnect. Your browser goes back to your own connection and the icon turns red. You stay logged in, so you can connect again at any time.
Log out
Click the logout icon at the top right of the extension window, next to the gear icon. Logging out also disconnects the proxy. You will need to log in again next time.
5. Settings
Click the gear icon at the top right of the extension window. Settings opens in a new tab. After you change anything, click Save Changes at the bottom of the page. If you enter a value outside the allowed range, it is adjusted to the nearest allowed value when you save.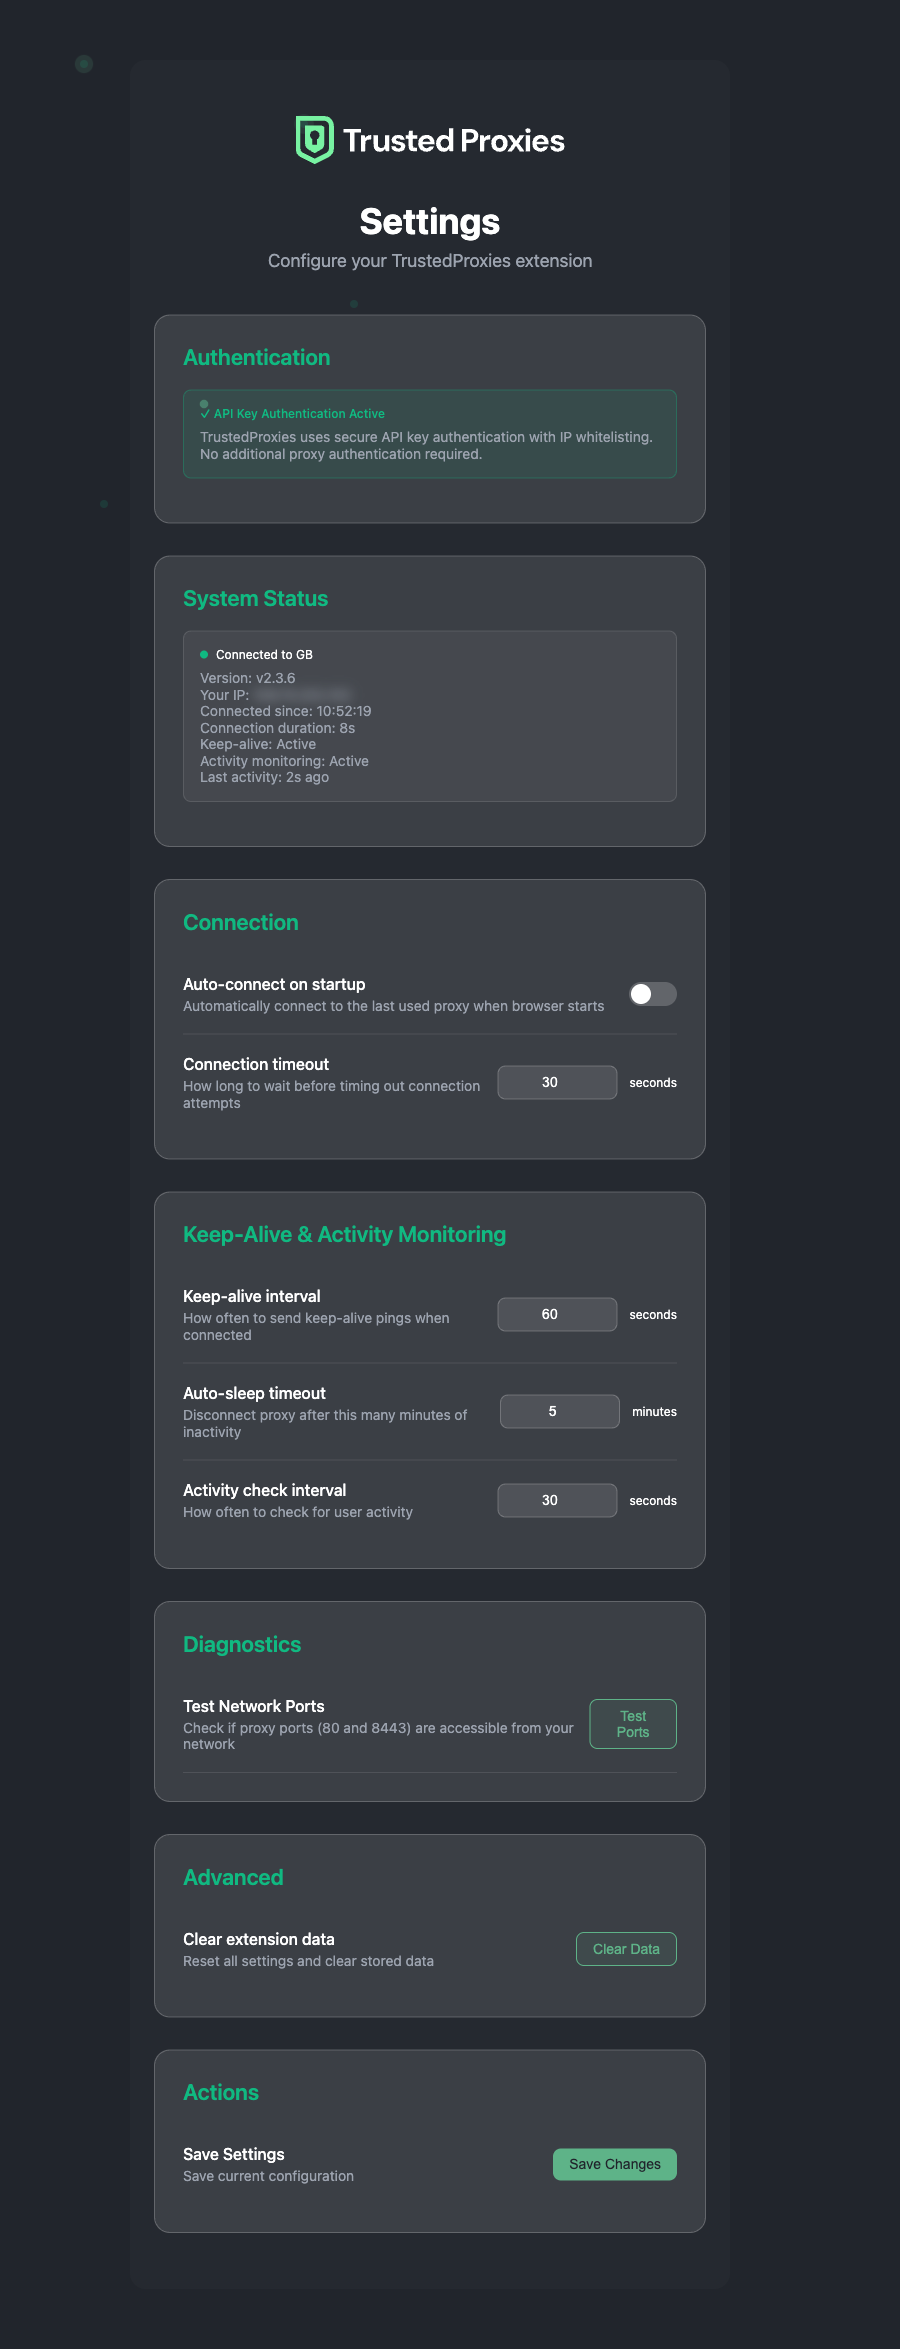
Authentication
Shows that you are logged in with your API key. There is nothing to change here.
System Status
Shows whether you are connected, your extension version, your IP address, how long you have been connected, and when the extension last saw you browsing.
Connection, Keep-Alive and Activity Monitoring
| Setting | What it does | Default | Allowed range |
| Auto-connect on startup | Connects to the last proxy you used when the browser starts. | Off | On or Off |
| Connection timeout | How long the extension waits when connecting before it gives up. | 30 seconds | 5 to 120 seconds in Chrome 5 to 300 seconds in Firefox |
| Keep-alive interval | How often the extension checks the connection while you are connected. | 60 seconds | 10 to 600 seconds |
| Auto-sleep timeout | Disconnects the proxy after this many minutes without browsing. See section 6. | 5 minutes | 1 to 60 minutes |
| Activity check interval | How often the extension checks whether you are browsing. | 30 seconds | 10 to 300 seconds in Chrome 10 to 120 seconds in Firefox |
Diagnostics
Test Ports checks whether ports 80 and 8443 are reachable from your network. The extension uses both. If one is blocked, it tries the other. If both show as blocked, the extension can't connect from your current network. Please send us a report (see section 7).
Advanced
Clear Data resets all settings to their defaults and removes your saved login. It also disconnects the proxy. You will need to log in again afterwards.
Firefox only
In Firefox you will also see Enhanced security validation and Debug logging. You can leave both at their defaults.
6. Why the proxy disconnects
Auto-sleep
If you don't browse for the number of minutes set in Auto-sleep timeout, the extension disconnects the proxy. The default is 5 minutes. Loading pages and switching tabs count as browsing. You stay logged in, so click Connect to carry on. To stay connected for longer, raise the timeout in Settings, up to 60 minutes, then click Save Changes.
Connection problems
If the proxy keeps refusing the connection, the extension disconnects and shows a message. Click Connect to try again. If it keeps happening, run Test Ports in Settings and send us a report (see section 7).
You see the login screen again
Logging out or using Clear Data takes you back to the login screen. If it happens without either of these, log in again and please send us a report so we can look into it.
7. Reporting a problem
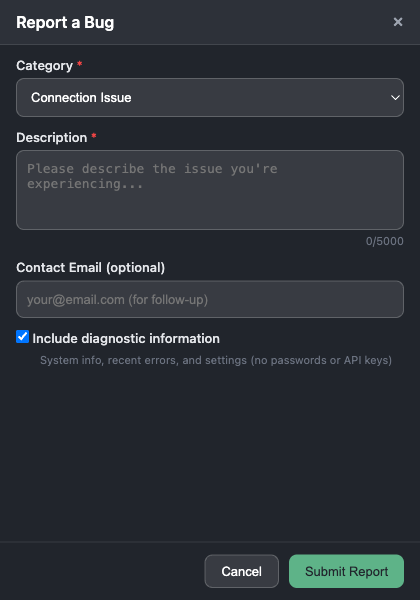
You can send us a report from inside the extension. It reaches our support team as a ticket, and we reply by email.
1. Click the extension icon.
2. Click Having trouble? Report an issue at the bottom of the window. This link is also on the login screen.
3. Choose a category: Connection Issue, Login Problem, Performance Issue or Other.
4. Describe what happened. For example, what you were doing, which proxy you were using, and what you saw.
5. Add your email address under Contact Email. This is optional when you are logged in. If you are not logged in, please add it so we can reply.
6. Leave Include diagnostic information ticked. It adds system information, recent errors and your extension settings, which helps us find the cause.
7. Click Submit Report.
8. Adding more proxies
You can order more proxies from your client area. Once they are active, click the round arrows button next to Available proxies and they will appear in the list.
9. Uninstalling the extension
Google Chrome: go to chrome://extensions, find GeoSet by Trusted Proxies and click Remove.
Mozilla Firefox: open the menu and choose Add-ons and themes, then Extensions. Find GeoSet by Trusted Proxies, click the three dots next to it and choose Remove.
