Trusted Proxies offers two authentication methods for its proxy servers:
-
Proxy Authentication – using a username and password.
-
IP Whitelisting – allowing access only from approved IP addresses.
You can switch between these methods from the Client Area by navigating to Proxy Management → Authentication Management. If you have multiple proxy accounts, be sure to select the specific account you want to manage.
For example, in this guide, we’ll demonstrate authentication management for the proxy account testuser.
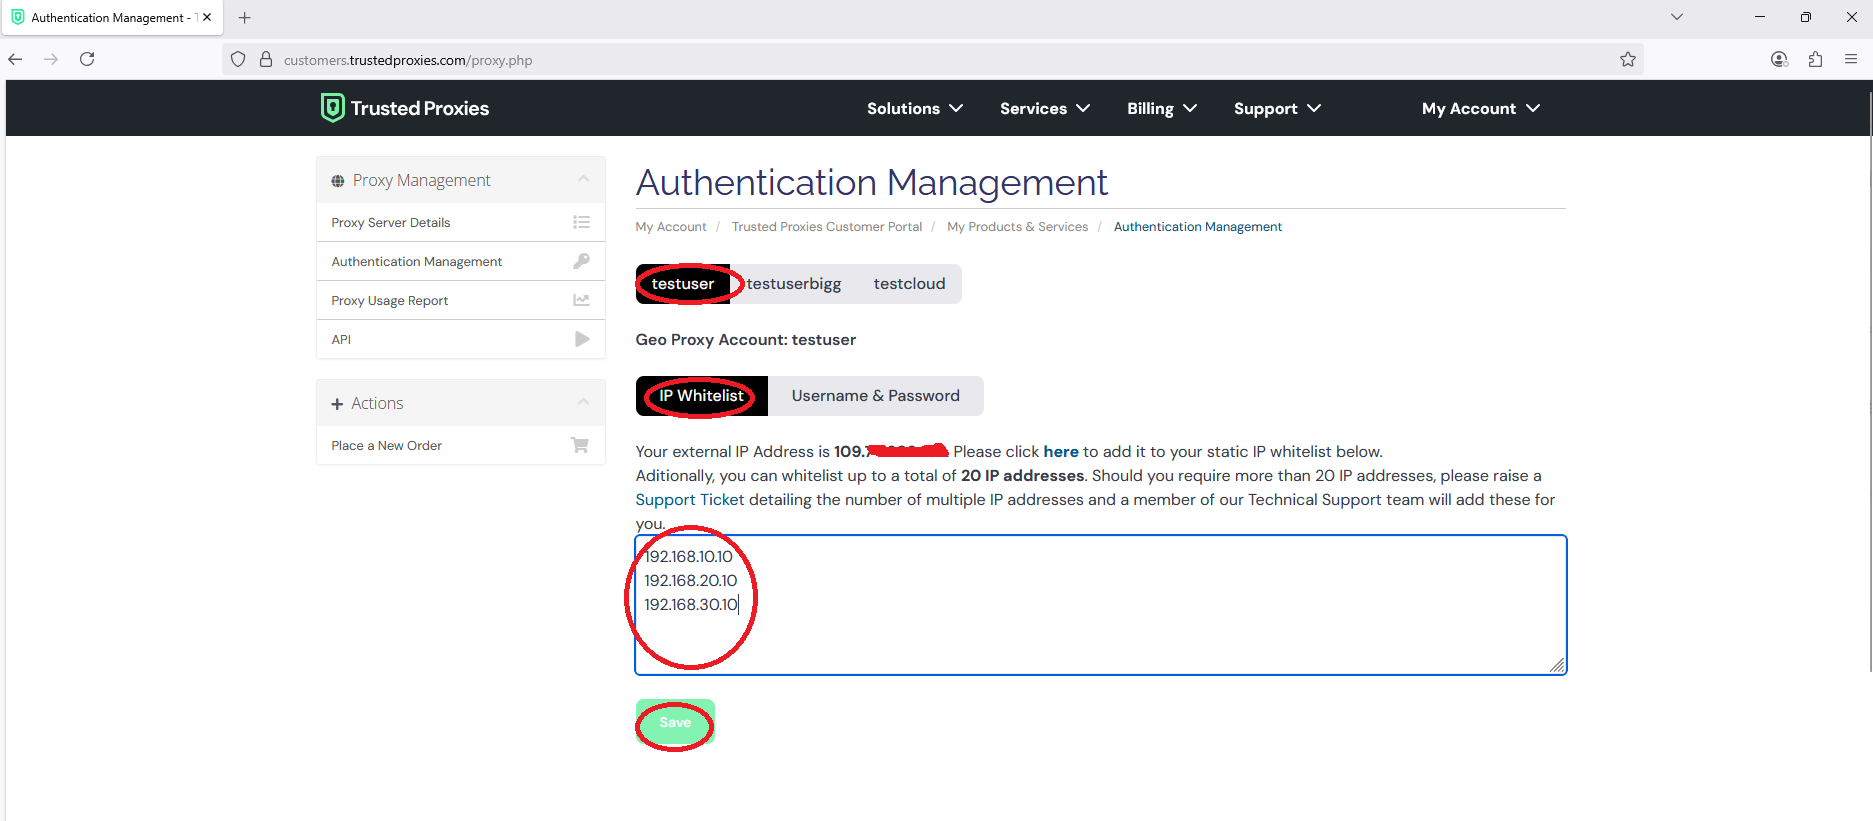
If your account already has whitelisted IPs, you will see them listed as static IPs. To add a new one, enter the additional IP address in the field below the existing list. Keep the current IPs unless you wish to remove them. Once entered, click Save. The new IP will then be authorized to access the proxy servers.
Note: Please take backup of your white listed IPs before making changes to the list so that you can restore from it in case you messed up with the list.
You can add up to 20 IPs to your whitelist directly from the Client Area. If you need to whitelist more than 20, please contact our support team by submitting a ticket.
If you would like to switch to Proxy Authentication, please click on Username & Password and type new password and then click save. Then, you will get warning message saying that IP White list will be cleared as shown in the screen shot below:
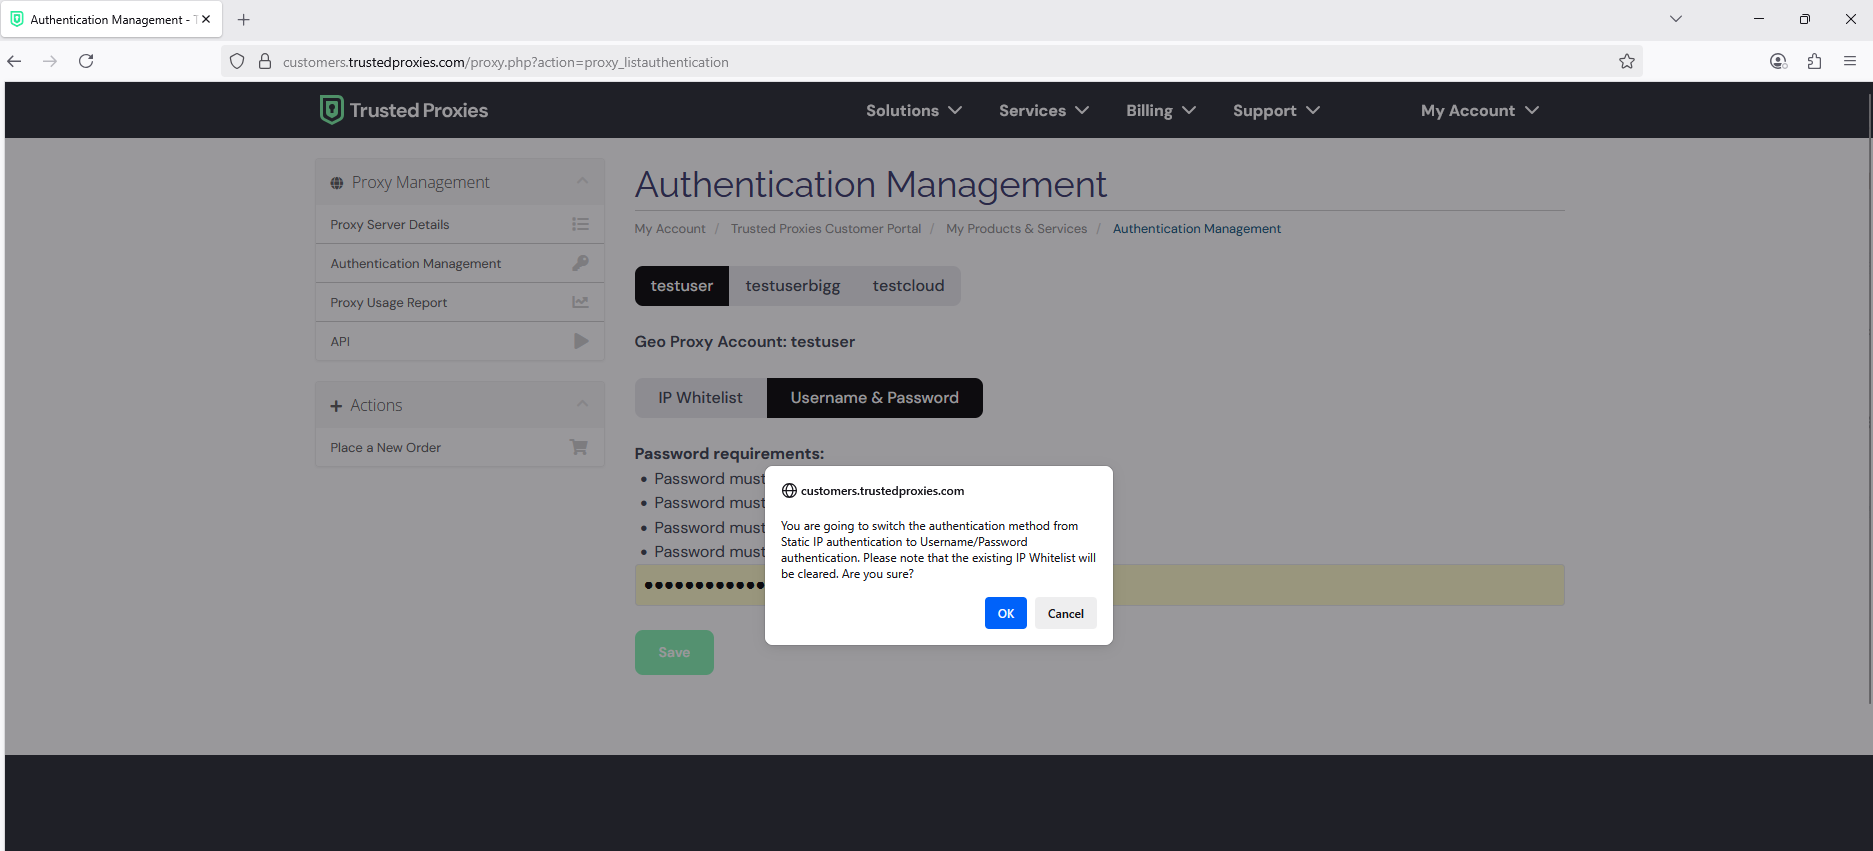
Click on OK on the pop up warning message, then your proxy authentication method will be switched to Username/Password. Now, you can access your proxy servers using username and password.
auth, authentication, login, whitelist, allow list, IP allowlist, proxy login, 407 Proxy Authentication Required, authentication error, auth failed, proxy username password, trusted proxies login, whitelist IP, white list
